PREFIX ex:
PREFIX geo:
PREFIX owl:
PREFIX rdf:
PREFIX rdfs:
PREFIX xsd:
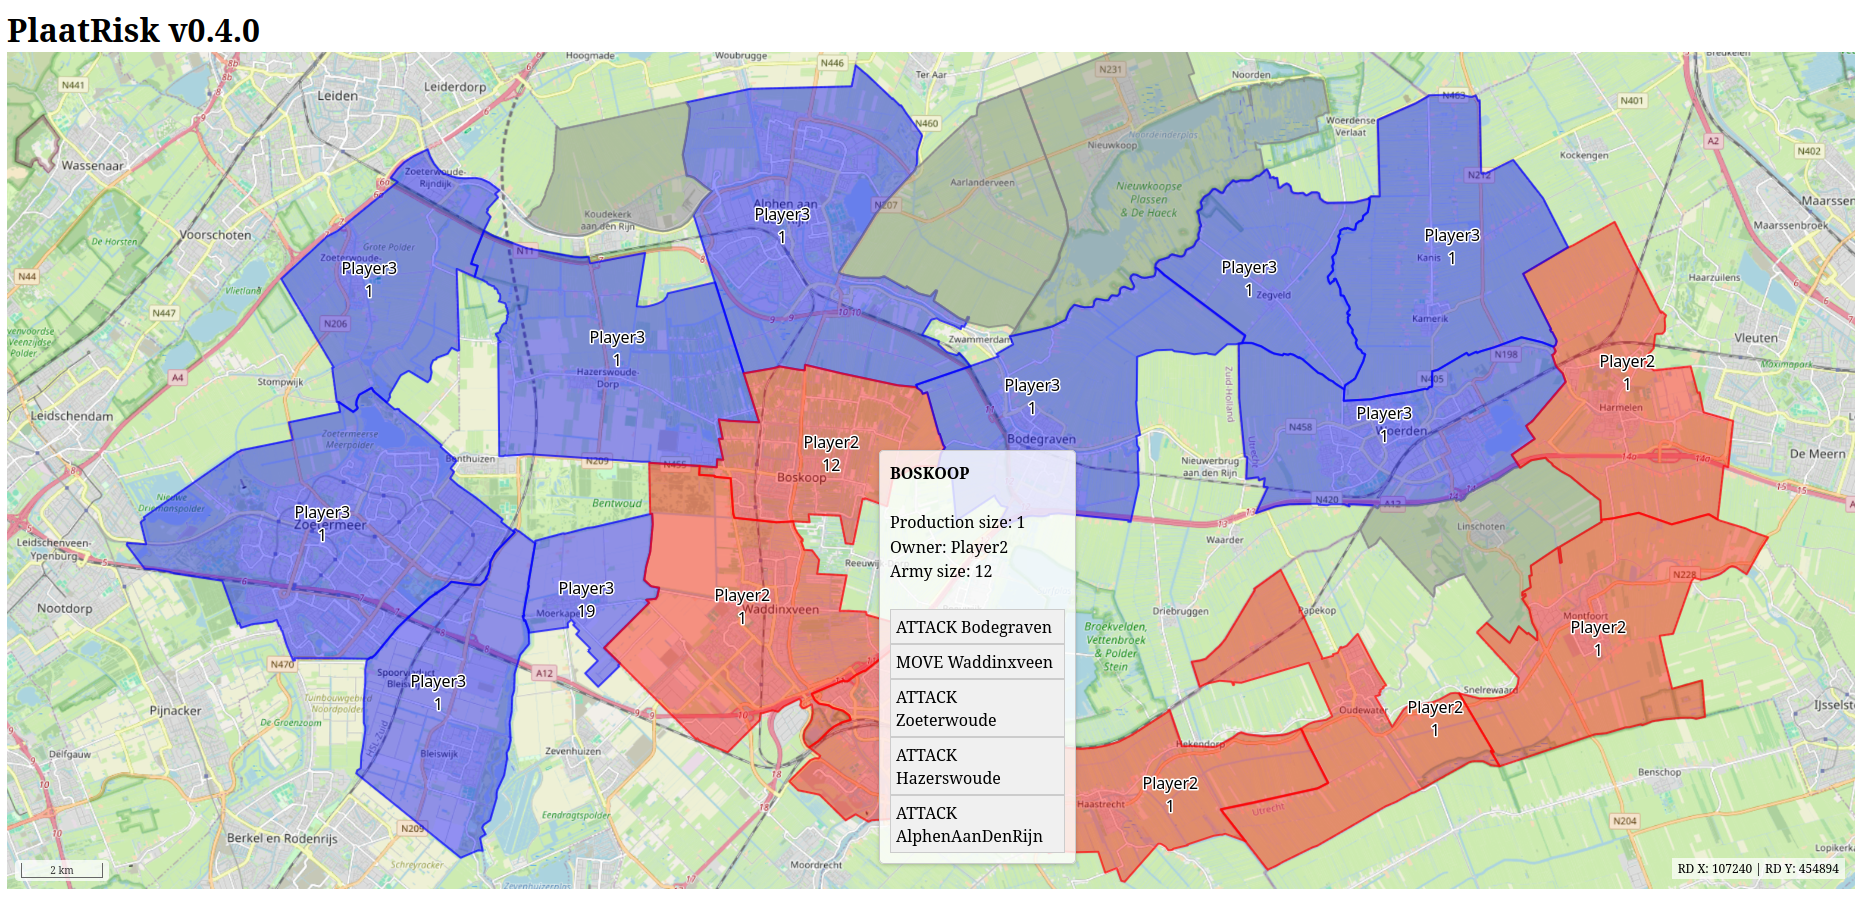
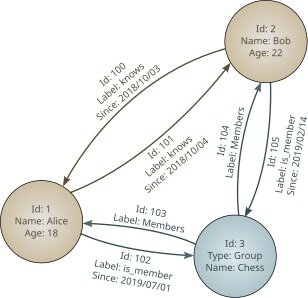
ex:Army rdf:type owl:Class;
rdfs:comment “A class representing army.”@en;
rdfs:label “Army” .
ex:hasArmy rdf:type owl:ObjectProperty;
rdfs:comment “The player has army.”@en , “The city has army.”@en;
rdfs:domain ex:Player , ex:City;
rdfs:label “has army”;
rdfs:range ex:Army .
ex:City rdf:type owl:Class;
rdfs:comment “A class representing city.”@en;
rdfs:label “City” .
ex:hasPlayer rdf:type owl:ObjectProperty;
rdfs:comment “The army has player.”@en;
rdfs:domain ex:Army;
rdfs:label “has player”;
rdfs:range ex:Player .
ex:hasCity rdf:type owl:ObjectProperty;
rdfs:comment “The army has city.”@en;
rdfs:domain ex:Army;
rdfs:label “has city”;
rdfs:range ex:City .
geo:hasGeom rdf:type owl:DatatypeProperty;
rdfs:comment “The city has geom.”@en;
rdfs:domain ex:City;
rdfs:label “has geom”;
rdfs:range geo:wktLiteral .
ex:hasConnection rdf:type owl:ObjectProperty;
rdfs:comment “The city has connection.”@en;
rdfs:domain ex:City;
rdfs:label “has connection”;
rdfs:range ex:City .
geo:hasCrs rdf:type owl:DatatypeProperty;
rdfs:comment “The city has crs.”@en;
rdfs:domain ex:City;
rdfs:label “has crs”;
rdfs:range .
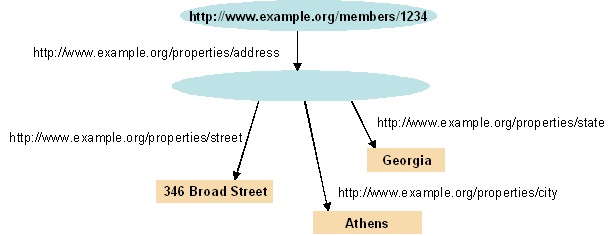
ex:hasName rdf:type owl:DatatypeProperty;
rdfs:comment “The army has name.”@en , “The player has name.”@en , “The city has name.”@en;
rdfs:domain ex:Army , ex:Player , ex:City;
rdfs:label “has name”;
rdfs:range xsd:string .
ex:hasProduction rdf:type owl:DatatypeProperty;
rdfs:comment “The city has production.”@en;
rdfs:domain ex:City;
rdfs:label “has production”;
rdfs:range xsd:integer .
ex:hasSize rdf:type owl:DatatypeProperty;
rdfs:comment “The army has size.”@en;
rdfs:domain ex:Army;
rdfs:label “has size”;
rdfs:range xsd:integer .
ex:Player rdf:type owl:Class;
rdfs:comment “A class representing player.”@en;
rdfs:label “Player” .
ex:hasEmail rdf:type owl:DatatypeProperty;
rdfs:comment “The player has email.”@en;
rdfs:domain ex:Player;
rdfs:label “has email”;
rdfs:range xsd:string .