
![]() PlaatDomotica collects information from your all kind of sensors and process it. The data is presented on a state-of-the-art WebGUI (optimized for mobile us)
PlaatDomotica collects information from your all kind of sensors and process it. The data is presented on a state-of-the-art WebGUI (optimized for mobile us)
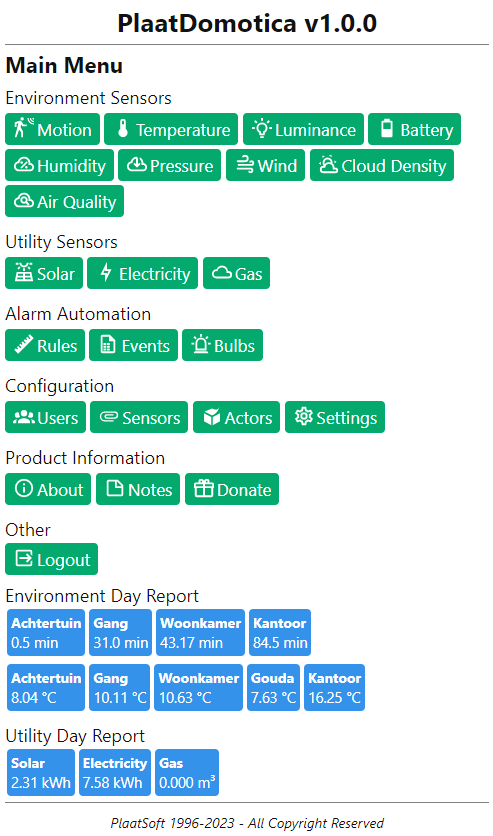
Key Features:
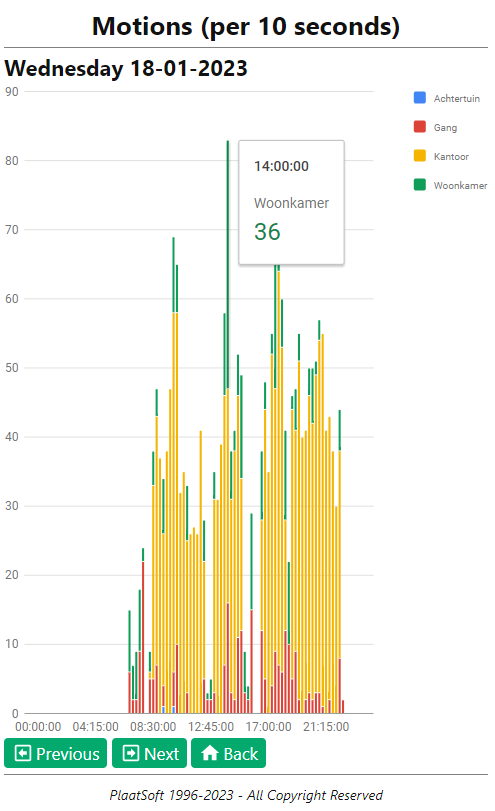
– Records every second motion sensor status (HUE devices)
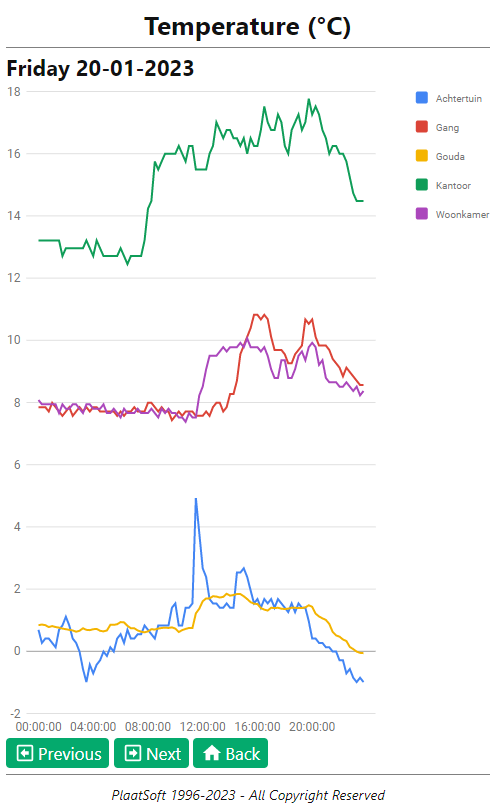
– Records every minute temperature / luminance / battery status (HUE devices)
– Records every minute solar energy delivered (HOSOLA device)
– Records every minute energy and gas consumption (Communicated with PlaatEnergy)
– Records every minute air temperature, air humidity, air pressure, air quality, wind speed and cloud density
– Show real-time and historical chart data in Web GUI
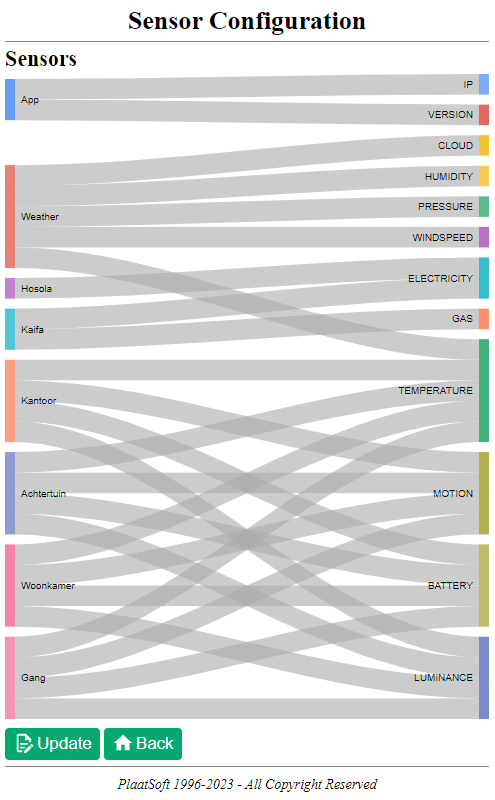
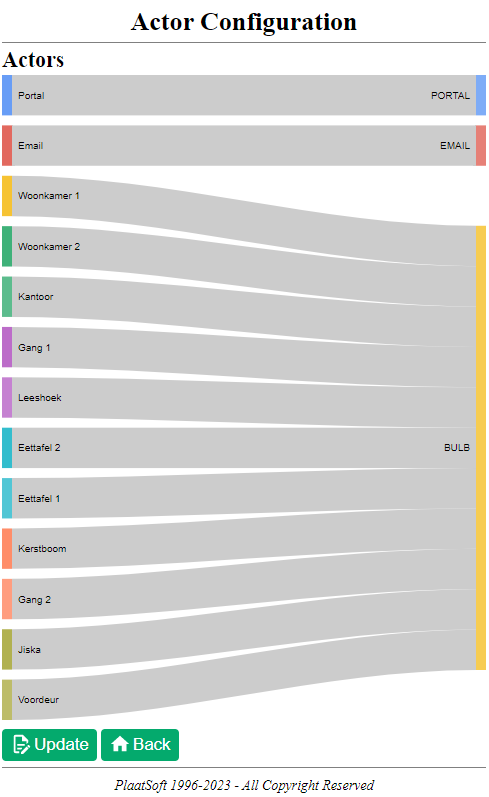
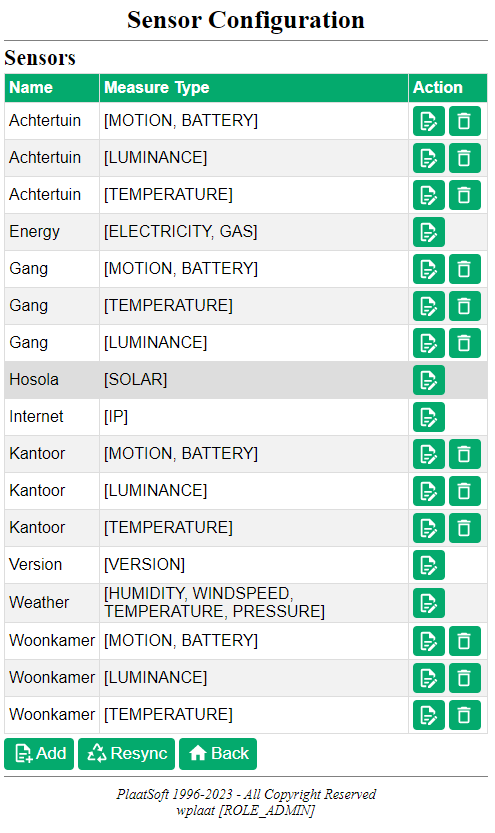
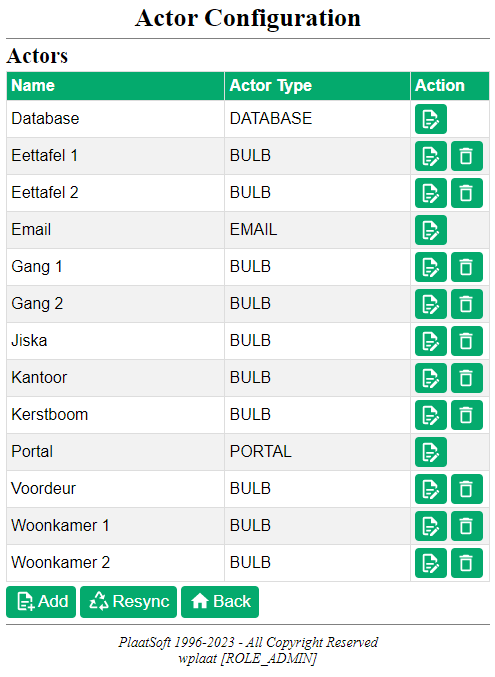
– Actor module (Manage Portal, Email and Hue Bulbs)
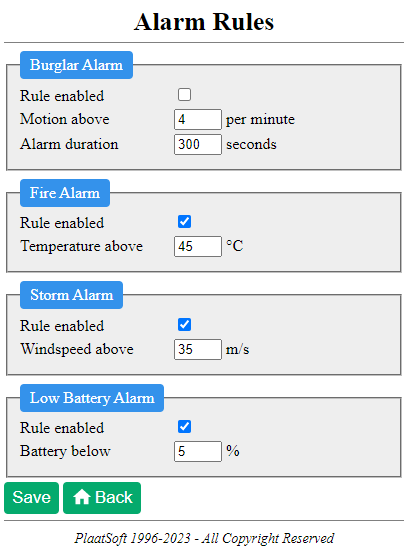
– Alarm module (Trigger one or more actors when motion, fire, storm and/or battery low event ocur)
– Event module (Inform user about historal alarm triggers and more)
– Bulb module (Switch on/off your Hue lights)
– Web GUI support secure access based on OAUTH2
– and much more!
Needed hardware
– Raspberry Pi (for example model 4B).
– SDcard: 16GB or higher
– Operating System: Latest Debian (Lite) for Raspberry Pi
– Optional: Solar Converter + solar panels.
Screenshots
Release Notes
Click here for the release notes
Installation Instruction
## Step 1a - Install latest Java (Java 17 or higher is needed)
sudo apt update
sudo apt install default-jdk

## Step 2 - Install Postgres
sudo apt install postgresql

## Step 3 - Create schema, user and database
sudo su postgres
psql
CREATE USER domotica WITH PASSWORD 'domotica';
ALTER USER domotica WITH SUPERUSER;
CREATE DATABASE domotica WITH OWNER domotica;
GRANT ALL PRIVILEGES ON DATABASE domotica TO domotica;

## Step 4a - Create installation directory
mkdir /opt/plaatdomotica
chmod a+wrx /opt/plaatdomotica

## Step 4b - Copy two jar files (*.jar files are in GIT repo)
cp plaatdomotica-backend.jar /opt/plaatdomotica
cp plaatdomotica-frontend.jar /opt/plaatdomotica

## Step 5 - Enable apps as unix systemd services (*.service files are in GIT repo)
cp  plaatdomotica-backend.service /etc/systemd/system
cp  plaatdomotica-frontend.service /etc/systemd/system
sudo systemctl enable plaatdomotica-backend.service
sudo systemctl start plaatdomotica-backend.service
sudo systemctl enable plaatdomotica-frontend.service
sudo systemctl start plaatdomotica-frontend.service

## Step 6 (optional) Redirect port 80 to 8083
sudo apt-get install iptables
sudo iptables -A PREROUTING -t nat -i eth0 -p tcp --dport 80 -j REDIRECT --to-port 8083

## Step 7 - Start browser and enter http://<ip>:8083. Default credentials are:
username=admin
password=admin

## Step 8 - Done
Installation is done. Good Job!
If there are any questions please sent an email to info@plaatsoft.nl
Open Source
The checkout the source code here
plaatdomotica-frontend
plaatdomotica-backend
Disclaimer
This program is free software: you can redistribute it and/or modify it under the terms of the GNU General Public License as published by the Free Software Foundation, either version 3 of the License, or (at your option) any later version.
This program is distributed in the hope that it will be useful, but WITHOUT ANY WARRANTY; without even the implied warranty of MERCHANTABILITY or FITNESS FOR A PARTICULAR PURPOSE. See the GNU General Public License for more details.
You should have received a copy of the GNU General Public License along with this program. If not, see http://www.gnu.org/licenses/.